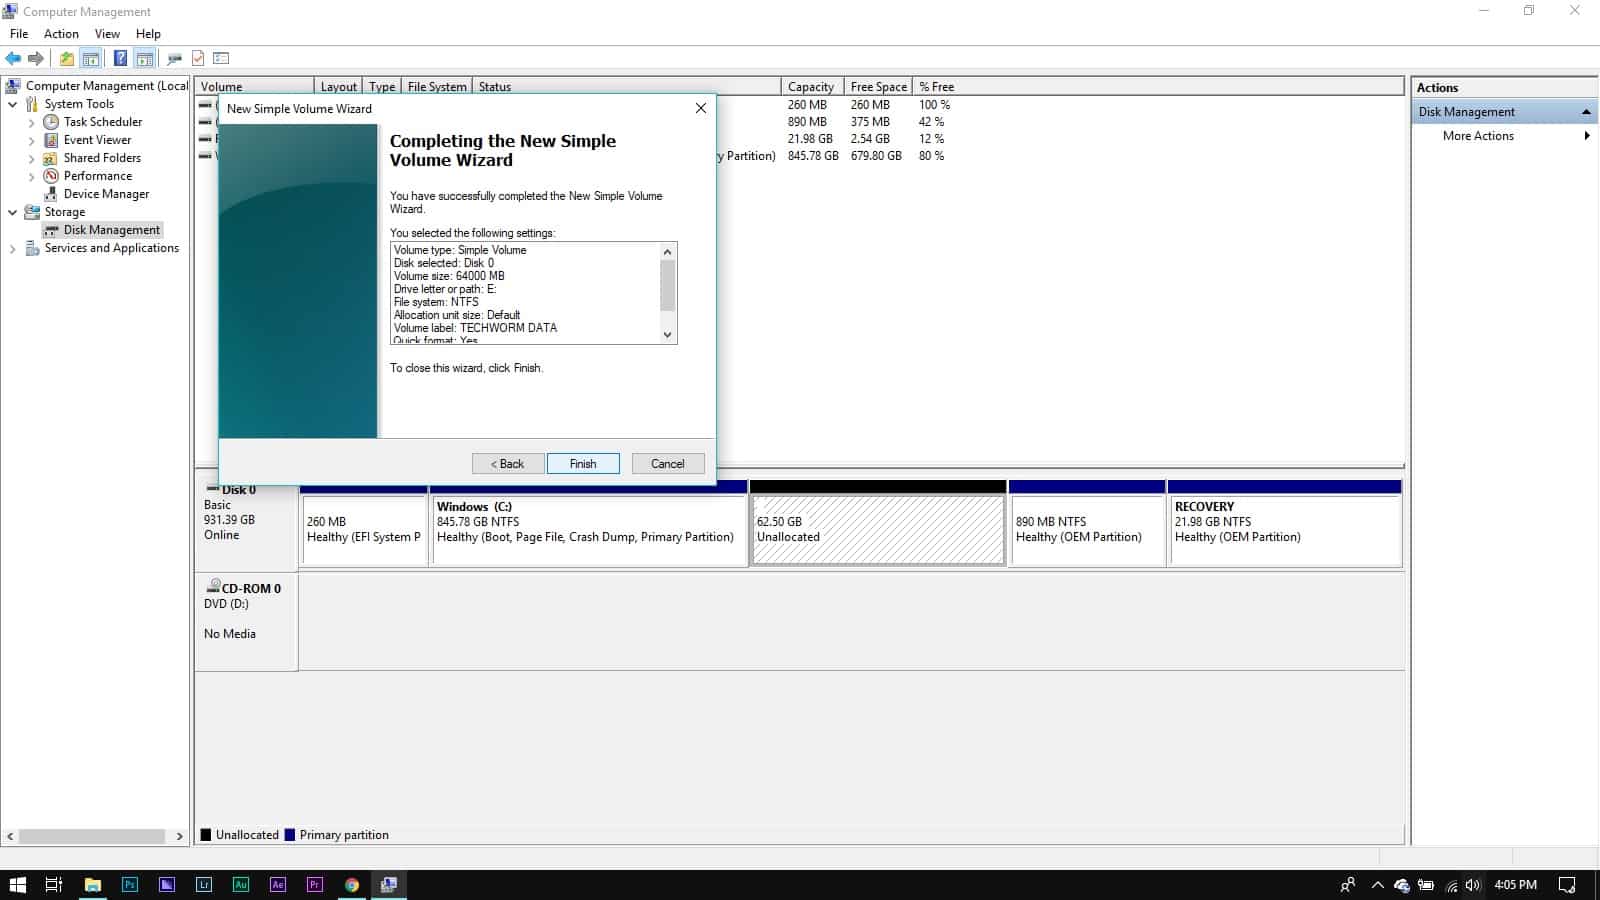
Windows 10 is one of the most popular computer operating systems that is used by millions of users across the globe. One of the major highlights of Windows 10 is the ability to partition a hard drive as per users preference. A hard drive can be partitioned to organize and store sensitive data at different locations. Additionally, a partitioned hard disk can also be used to install a second operating system like Ubuntu. So here’s a detailed guide on how you can partition a hard drive in Windows 10. ALSO READ: How To Create A Bootable Windows 10 USB or an Installation Disk
How To Partition A Hard Drive In Windows 10
Partitioning a hard drive in Windows 10 laptop or computer is a fairly simple process. That said, it’s important to backup all of your data before initiating the actual partition process.
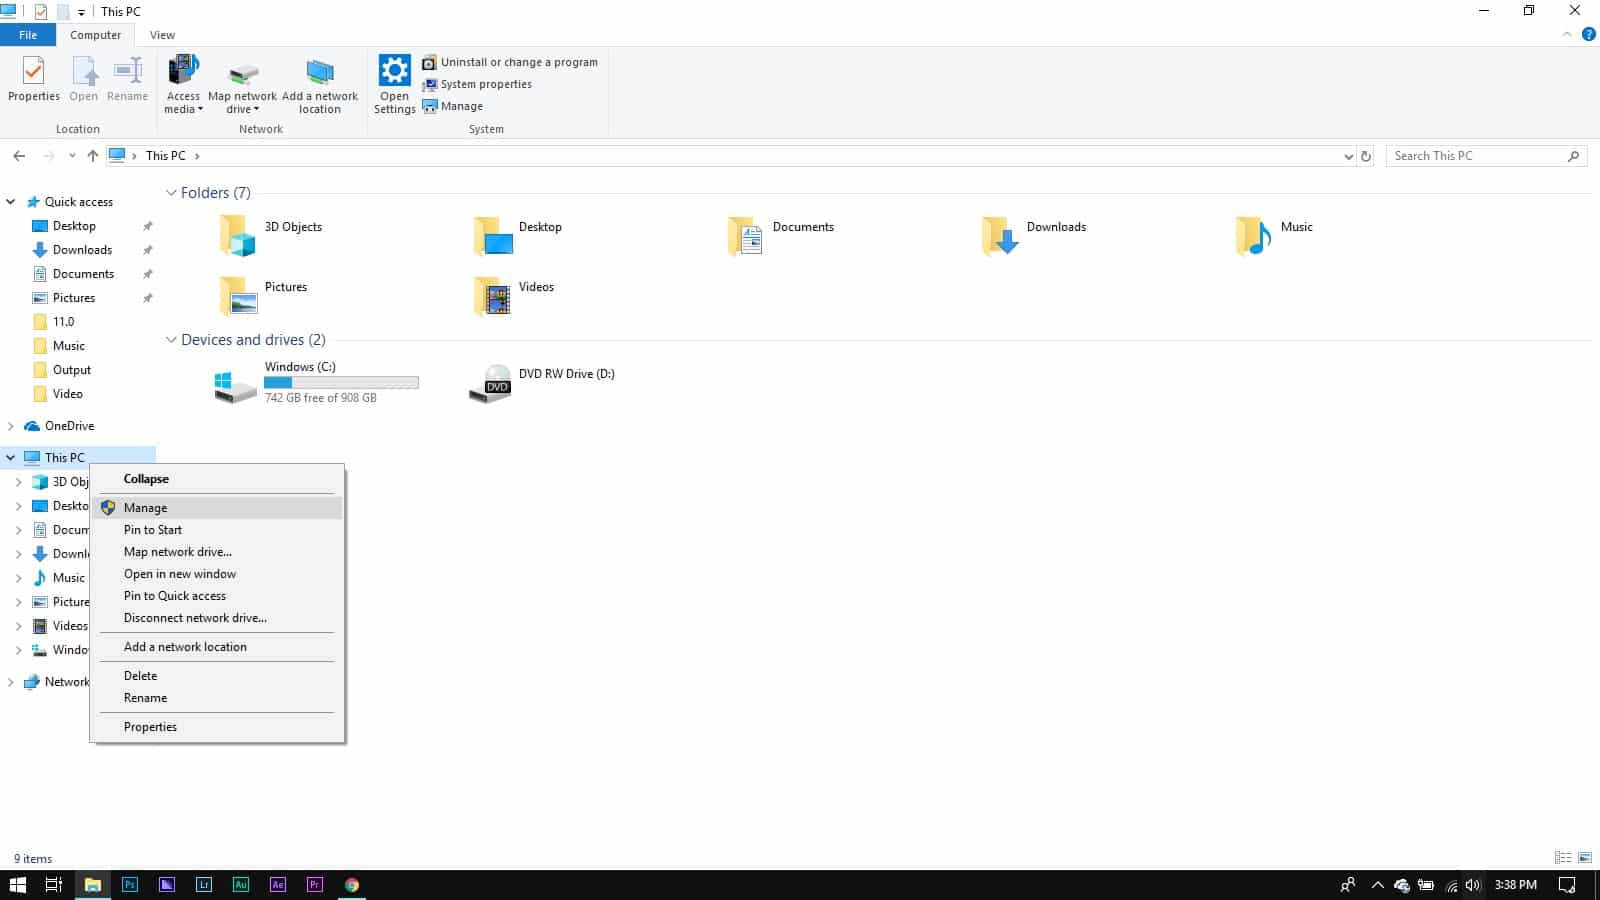
Open File Explorer from the Taskbar and right click on This PC. Select Manage from the context menu.
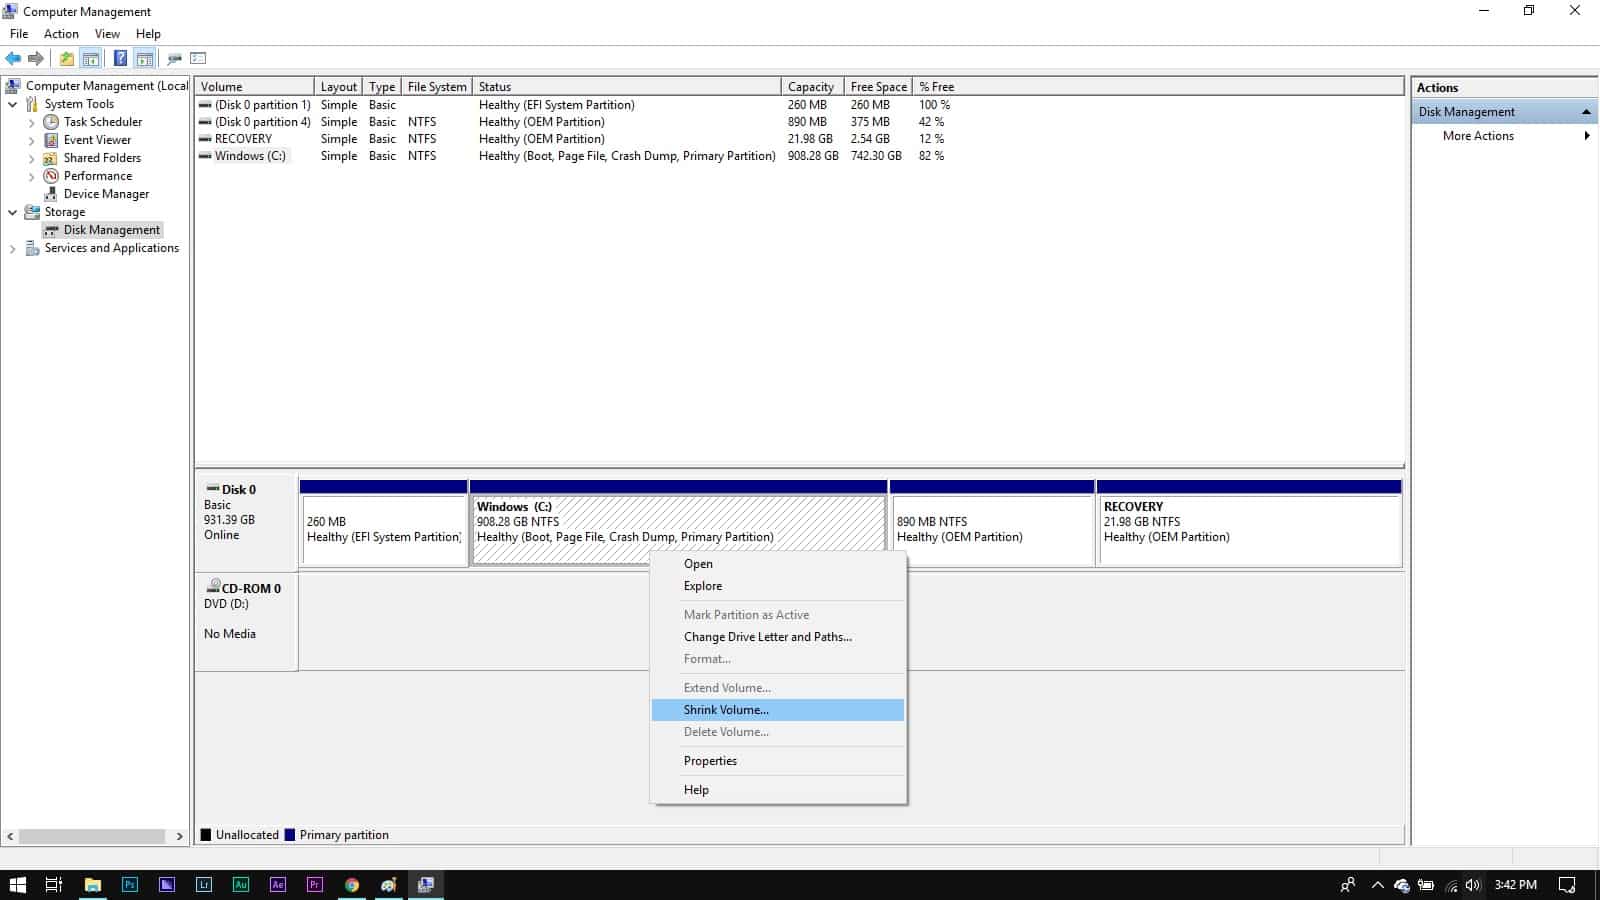
Next up select Disk Management from the Storage category. Right click on C: Drive and select Shrink Volume from the context menu.
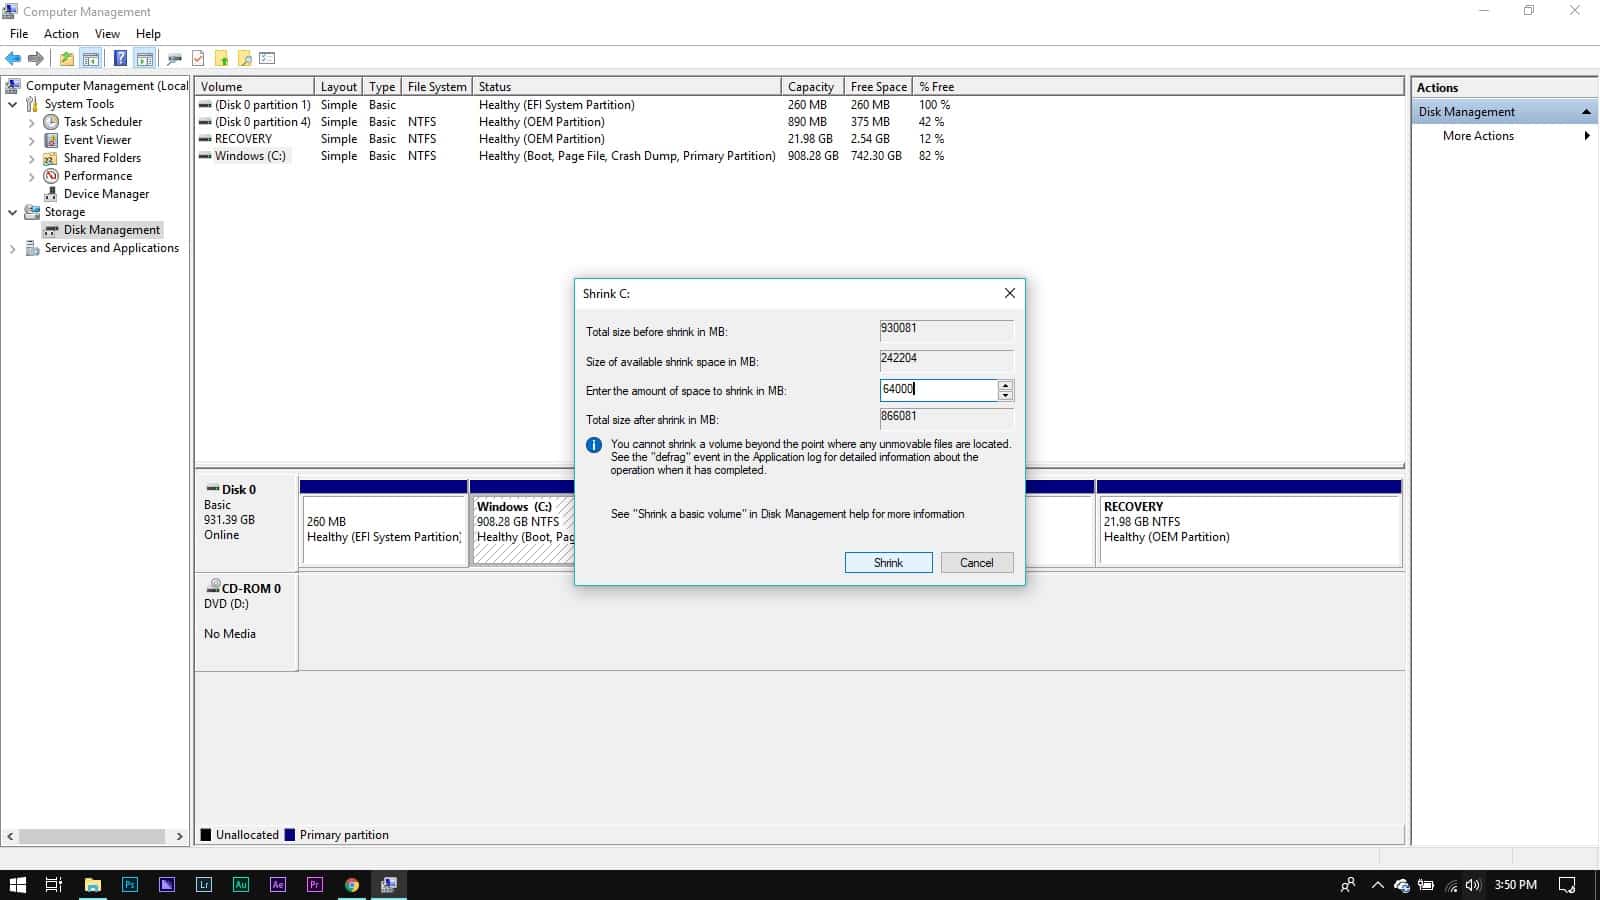
Input the amount of space that you want to allocate to the new drive.
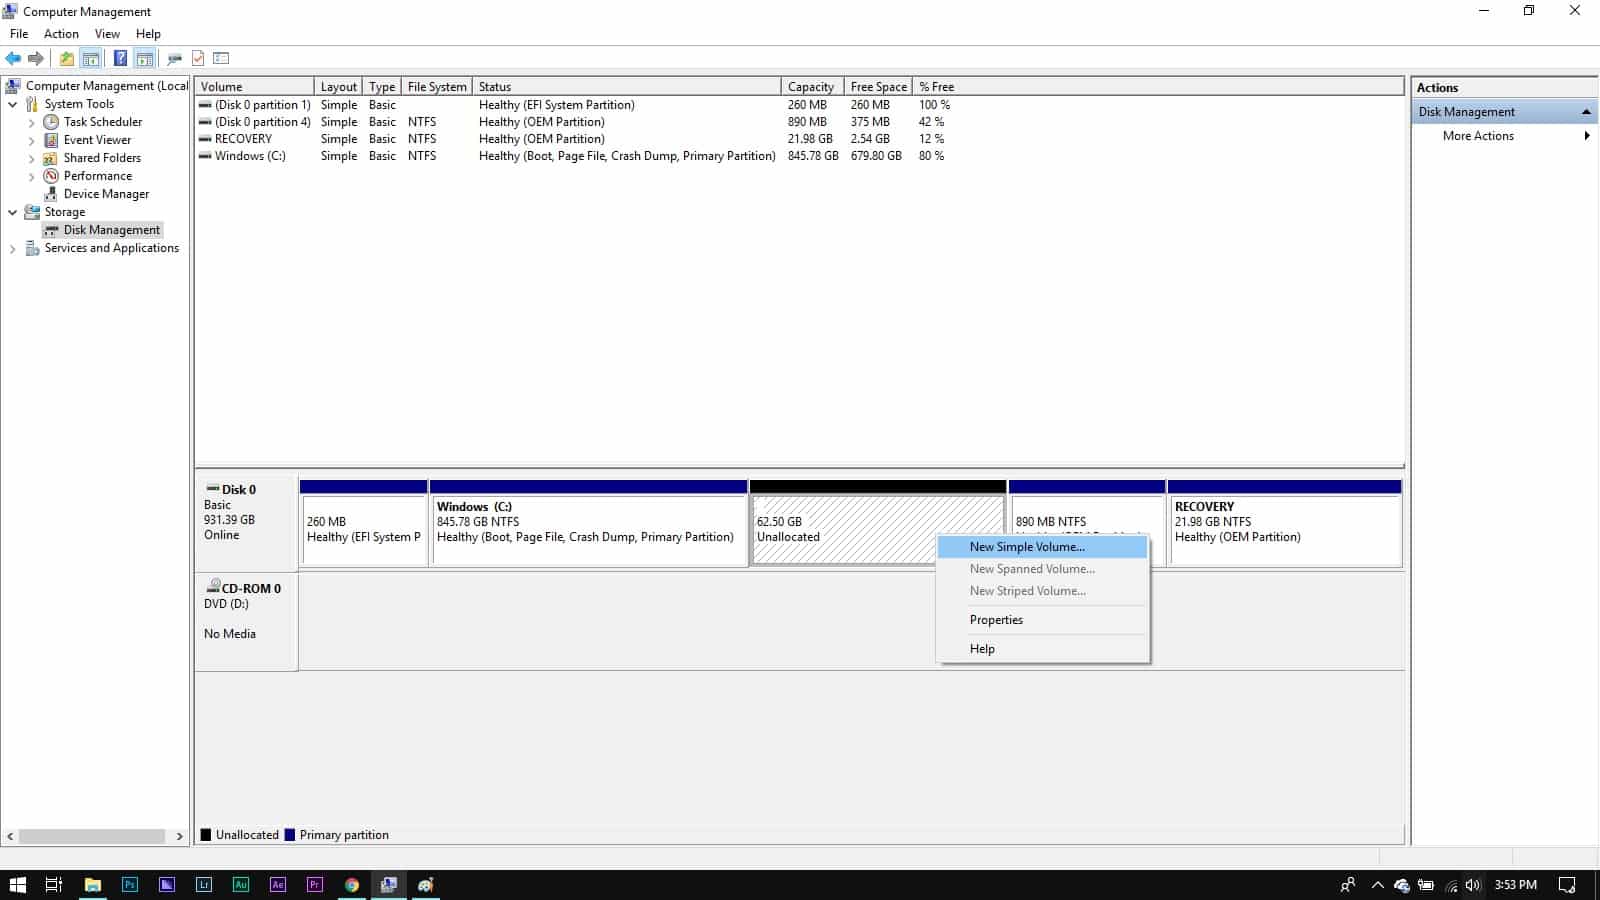
Right click on Unallocated and select New Simple Volume from the context menu.
Follow the simple on-screen instructions and rename your newly created drive.
As mentioned earlier, a partitioned hard drive can be used to organize different files and folders. You can create as many partitions as you want for organizing and securing your data. So this was a simple guide on how to create a partition in Windows 10. If you face any issues in following this procedure then do let us know in the comments section below. BONUS VIDEO
Also read– Best Windows 10 Themes and Skins
